Roof inspections are a crucial part of maintaining the structural integrity of your home or business. Entrusting your roof maintenance needs to Rosenow Customs, you secure expertise and meticulous attention to detail at every step. This process, often overlooked, plays a significant role in preventing minor issues from escalating into costly repairs. This article will provide a comprehensive roof inspection checklist, helping you understand what to expect during a roof inspection, the elements involved, common problems to look out for, and the steps to take following an inspection.
Understanding Roof Inspection
Delving into the realm of roof inspections can be a daunting task, especially if you’re not familiar with the intricacies of roofing. Fear not, as we’re here to guide you through this essential home maintenance task. A roof inspection is more than just a cursory glance at your roof—it’s a proactive measure designed to extend the lifespan of your roof and maintain its structural integrity. The importance of this process cannot be overstated, and understanding the optimal timing for inspections is equally crucial. This section aims to demystify the concept of roof inspections, providing you with the knowledge you need to make informed decisions about your roof’s upkeep.
What is a Roof Inspection?
So, what exactly does a roof inspection entail? It’s a comprehensive process carried out by a roofing expert, designed to evaluate the current state of your roof, pinpoint any existing damage, and identify potential future issues. This isn’t a task that can be completed with a simple ground-level glance at your roof—it requires a detailed examination of both the interior and exterior elements of your roof. During an inspection, a professional will assess a variety of factors, including the overall appearance of the roof, signs of surface degradation, leaks, and any issues arising from improper installation. It’s important to note that a roof inspection isn’t solely about uncovering problems—it’s also an invaluable opportunity to nip minor issues in the bud before they evolve into major, wallet-draining repairs.
Significance of Roof Inspection
The importance of roof inspections cannot be overstated. The roof serves as your home’s primary shield against the elements, including rain, wind, hail, ice, and the sun’s relentless rays. These forces of nature can gradually wear down your roof, causing leaks and potentially compromising your home’s structural integrity.
Conducting a thorough roof inspection provides homeowners with a clear understanding of their roof’s current state, enabling them to address any issues proactively. This preventative approach not only averts further damage but also saves on expensive repairs down the line. An inspection can also reveal hidden problems, such as mold, moss, or rot, which could negatively affect indoor air quality and the health of the home’s occupants.
In addition, regular roof inspections can enhance your property’s value. Prospective buyers place a high value on a well-maintained roof, viewing it as an indicator of a well-cared-for property. This can serve as a unique selling point and potentially boost the overall value of your home.
Lastly, regular roof inspections can prove advantageous for insurance purposes. In the event of storm damage or other natural disasters, having a record of consistent inspections can support your insurance claim, demonstrating that the damage was not due to neglect or poor maintenance.
Timing of Roof Inspection
Choosing the optimal time for a roof inspection is key to identifying and addressing any potential damage or weaknesses promptly. As a rule of thumb, homeowners should arrange for a professional roof inspection every one to two years. However, there are certain instances when an inspection may be particularly beneficial.
- After Severe Weather: Following a significant weather event such as a storm, hailstorm, or high winds, a roof inspection is highly recommended. These events can inflict both visible and hidden damage, from missing shingles to leaks or even structural damage.
- Seasonal Transitions: It’s advisable to schedule a roof inspection twice a year, typically in the spring and fall. A spring inspection can identify any damage incurred during the winter, while a fall inspection can prepare your roof for the upcoming winter conditions.
- Prior to Home Purchase: If you’re in the process of buying a home, arranging a roof inspection before finalizing the purchase is a smart move. This can uncover any existing roof issues, allowing you to factor in repair costs into your buying decision.
- Post Roof Repairs: After significant repairs or the installation of a new roof, an inspection should be conducted to verify that the work has been done correctly and meets the required standards.
In conclusion, regular roof inspections are a wise investment, helping to identify minor issues before they escalate into major, and potentially costly, problems.
Elements of a Roof Inspection
A comprehensive roof inspection is more than just a surface-level examination. It delves into the intricate details of your roofing system, both inside and out, and scrutinizes the materials used. This multi-faceted approach ensures a thorough understanding of your roof’s current condition and potential issues. In the following sections, we will break down these core elements, providing you with a clear picture of what a meticulous roof inspection entails.
Indoor and Outdoor Roof Check
A meticulous roof inspection is a two-pronged approach, involving both indoor and outdoor assessments. This dual examination ensures a complete understanding of your roof’s condition.
Outdoor Roof Check
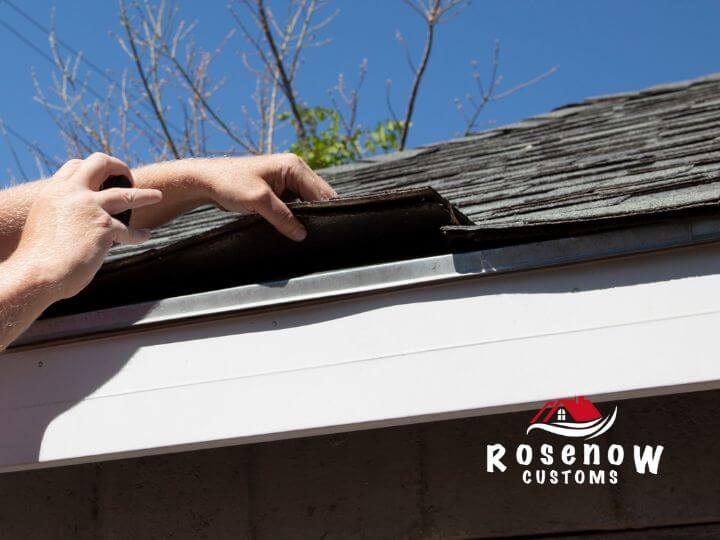
The outdoor check focuses on the external aspects of your roof. The inspector will look for visible signs of damage, such as missing or deteriorating shingles, compromised flashing, or cracked caulking. The gutters and downspouts are also examined for any blockages or debris that could hinder water flow. Additionally, the presence of moss, algae, or lichen could indicate moisture retention, which can cause damage over time. If your property has a chimney, it will also be inspected for signs of wear and tear.
Indoor Roof Check
The indoor check, on the other hand, is centered around your attic space. The inspector will look for signs of water intrusion, such as stains on ceilings or walls, which could suggest a leak. The effectiveness of your insulation will also be assessed, as inadequate insulation can lead to excessive attic heat, which can prematurely age your roof’s shingles. Proper ventilation is another key factor, as it helps regulate temperature and moisture levels in the attic.
This combination of indoor and outdoor checks provides a holistic view of your roof’s health, helping to identify any areas that may need attention or repair.
Review of Roofing Materials
The composition of your roof, specifically the materials used, plays a pivotal role in its overall performance, longevity, and durability. Therefore, an integral component of a roof inspection is a thorough examination and evaluation of these materials.
Shingles and Tiles: Shingles and tiles are among the most prevalent roofing materials. It’s crucial to inspect them for any visible or concealed damage that could undermine the roof’s structural integrity. Indicators of potential problems include missing, curling, or fractured shingles and tiles.
Flashing: This refers to metal sections used to cover joints in roof construction, preventing water from infiltrating and causing harm. The inspector should scrutinize them for any signs of cracking, rust, or disconnection.
Sealants and Caulk: These substances are employed to seal roof penetrations such as vents, pipes, and chimneys. If these materials deteriorate or break down, leaks can occur. Therefore, they should be inspected for any damage or malfunction.
Gutters and Downspouts: Constructed from metal or vinyl, gutters and downspouts direct rainwater off the roof and away from the building’s foundation. They should be inspected for cleanliness, secure attachment, and unobstructed drainage.
Underlayment: This additional layer, situated between the roof deck and the shingles, provides water resistance and extra insulation. While it may not be immediately visible, signs of issues, such as leaks, can indicate the need for its inspection.
Understanding the condition of these materials can guide the necessary repair or maintenance actions, extending your roof’s lifespan.
Identifying Common Roof Problems
Every roof, despite its unique construction and characteristics, can be susceptible to a set of common issues. Timely and accurate identification of these problems can save homeowners considerable expense, time, and inconvenience. These recurring issues include leaks and moisture, structural damages, and installation errors. In the following sections, we’ll delve into these prevalent problems, offering advice and insights to help you identify potential issues before they escalate. Let’s begin our detailed exploration.
Detection of Leaks and Moisture
Uncovering leaks and moisture build-up during a roof inspection is crucial to prevent significant structural damage. These issues are often manifested through water stains or discoloration on your home’s interior walls and ceilings.
Identifying Leak Indicators: Keep an eye out for damp spots, standing water, or even mold growth in the attic or other areas of your home. These are telltale signs of a potential leak.
Understanding Leak Causes: A multitude of factors can contribute to leaks, including cracked or missing shingles, ineffective sealant, and faulty flashing. Extreme weather conditions can also lead to shingle displacement, exposing parts of the roof to rain and triggering leaks.
Addressing Moisture Concerns: Beyond active leaks, moisture can accumulate in roofing materials due to inadequate ventilation. This can result in issues such as mold, rot, and gradual deterioration of roofing materials.
Spotting External Signs: On the exterior, look for warped or rotting wood, sagging roof areas, shingles with mold or algae growth, and persistently damp spots. These are clear indicators of leaks or moisture problems.
By promptly identifying and addressing leaks and moisture issues, you can preserve the structural integrity and lifespan of your roof, while maintaining the aesthetic appeal of your home.
Finding Structural Issues
Beyond superficial damage and leaks, roofs can also suffer from more serious structural issues that could compromise the safety and stability of your home.
Assessing Roof Deck Damage: The roof deck serves as the foundation of your roof. Damage to this area, often due to water infiltration, can result in sagging, cracks, or leaks. Signs of such damage typically include discoloration or water spots on the ceilings and walls beneath the roof deck.
Addressing Sagging Roofs: A sagging roof is a common structural issue that warrants immediate attention. This could be a result of water damage, improper installation, or insufficient support for the weight of the roofing materials. If left unattended, a sagging roof can lead to a catastrophic collapse.
Inspecting Chimneys and Vents: Chimneys and vents can also present structural issues, such as missing or loose flashing, deteriorating bricks, or cracks, which can lead to water leakages.
Checking Gutters: Gutters that are improperly installed or damaged can cause water to overflow and seep into the home’s foundation, leading to structural damage over time. Regular cleaning and maintenance of gutters are essential.
Regular inspections can help uncover these hidden issues early, allowing for timely repairs and maintenance. This proactive approach can prevent escalating costs and potential safety risks.
Spotting Improprieties in Installation
A roof’s performance and longevity can be significantly compromised by installation errors, which can lead to frequent, expensive repairs.
Shingle Misplacement: This is often evident through mismatched colors or misaligned tabs, as well as missing or damaged shingles. Such errors can result in leaks and instability in the roof structure.
Flashing Missteps: Flashings that are incorrectly placed or installed can fail to guide water off the roof, leading to leaks. You may notice cracks around the chimney, vents, or roof joints as a sign of this issue.
Gutter Installation Errors: Gutters that are not correctly sloped or securely attached can lead to improper drainage, which in turn can cause water pooling and structural damage over time.
Ventilation Issues: A roof needs adequate ventilation to maintain consistent airflow. Vents that are not properly installed can trap hot air in the attic during summer and cause condensation in winter, potentially leading to moisture and mold problems.
Underlayment Concerns: The underlayment serves as a secondary barrier against water and wind-driven rain. If it’s not properly installed, it could lead to leaks and moisture damage.
Regular roof inspections can help detect these installation issues early on, allowing homeowners to make necessary corrections. This proactive approach can ensure the roof’s longevity and optimal performance.
Steps Following a Roof Inspection
After the roof inspection is complete, it’s important to understand the findings and take the necessary steps to maintain your roof’s integrity. In the sections that follow, we’ll help you interpret your inspection report, plan for any needed repairs, and offer advice on how to maintain your roof’s health and longevity. This guidance will not only enable you to make informed decisions but also ensure your home’s well-being for many years. Let’s explore what actions you should take after your roof inspection.
Decoding Your Inspection Report
Upon completion of a roof inspection, a detailed report is generated, providing insights into the health of your roof. Here’s a guide to help you navigate this crucial document:
Grasping the Severity: The report will classify issues based on their severity. Urgent problems such as significant leaks or structural damage require immediate attention. Less severe concerns, like minor leaks or damaged shingles, should be addressed promptly to avoid further complications. Cosmetic issues or minor wear and tear can be managed gradually.
Recognizing the Problem: The report will clearly outline the problems detected during the inspection. These could vary from leaks, missing shingles, incorrect installation, to structural issues. Comprehending each problem is essential for planning effective repairs.
Pinpointing the Location: The report will highlight the exact locations of the defects. This information is invaluable when coordinating repairs or replacements.
Recommendations: The report will also include the inspector’s recommendations. These could range from repairing or replacing parts of the roof, adding elements like flashing or vents, or modifying components like gutters for improved water drainage.
Remember, if the report seems confusing, don’t hesitate to seek clarification from your inspector. Being well-informed is key to making the right decisions about your roof’s health and, by extension, your home’s safety.
Organizing for Repairs
Understanding your inspection report is just the first step. The next critical phase involves organizing for necessary repairs.
Setting Repair Priorities: Your repair plan should be based on the severity of the issues. Urgent problems like major leaks and structural damage should be addressed immediately, while less severe issues should be handled promptly, and minor repairs can be planned for a later date.
Engaging a Professional: Roof repairs can be complex and potentially hazardous. Therefore, it’s advisable to engage professional roofing services. These experts are trained to handle a variety of situations and adhere to safety protocols.
Financial Planning: Budgeting for roof repairs is crucial. Depending on the nature and extent of the damage, you might need to consider potential out-of-pocket expenses or explore the possibility of claiming repairs on your homeowner’s insurance.
Scheduling Repairs: Once you’ve budgeted and selected a professional, it’s time to schedule your repairs. Promptly addressing issues can prevent further damage to your roof and home.
Review and Verification: After the repairs, it’s important to review the work done to ensure all identified issues have been effectively resolved. A follow-up inspection can also be considered for confirmation.
Efficient and timely organization of repairs ensures the longevity of your roof, enabling it to continue protecting your home as intended.
Promoting Roof Health
The longevity and performance of your roof hinge on consistent care and preventative measures. It’s not a one-and-done deal, but rather an ongoing commitment to your home’s well-being.
Regular Inspections: Even when problems aren’t readily apparent, routine roof inspections are crucial. They allow for the early identification of potential issues and provide an opportunity for prompt intervention, averting further damage. For instance, an inspection might reveal a small crack that, if left unaddressed, could lead to significant water damage.
Cleaning: A clean roof is a healthy roof. Accumulated debris like leaves, twigs, or dust can lead to mold growth or rot. Regularly clearing your roof of such debris helps prevent these issues.
Maintenance of Gutters: Gutters play a vital role in directing water away from your roof. Regular cleaning and maintenance of your gutters prevent water from pooling and seeping into the roof structure.
Proactive Repairs: Small problems can escalate if ignored. Prompt attention to even minor issues like leaks, worn-out shingles, or loose flashing is essential. For example, a loose shingle might seem insignificant, but over time, it can lead to water seeping into your home.
Ventilation: Proper ventilation is key to maintaining a balanced temperature and humidity in your roof and attic area. This helps prevent issues related to condensation.
Professional Check-ups: While personal maintenance is important, professional check-ups offer an added layer of protection. Professionals can identify issues that might otherwise go unnoticed by homeowners.
By actively prioritizing your roof’s health through these steps, you can extend its lifespan, reduce the need for major repairs, and uphold the overall structural integrity of your home.
1. What is a Roof Inspection Checklist?
A Roof Inspection Checklist is a detailed guide used by a professional inspector or a homeowner to identify any potential issues or damages present on a rooftop.
2. Why is a Roof Inspection Checklist necessary?
Having a Roof Inspection Checklist is essential for identifying issues early, planning for repairs, and preventing further damage. Early detection may reduce costs and increase the lifespan of the roof.
3. Can homeowners conduct their roof inspections using a Roof Inspection Checklist?
Yes, homeowners can conduct basic roof inspections using a Roof Inspection Checklist. However, intricate issues that may require professional insight could be overlooked.
4. What are the key areas that a Roof Inspection Checklist cover?
The Checklist covers key areas including the overall appearance, signs of damage or leaks, condition of shingles, flashings, gutters, and chimneys.
5. How often do professionals recommend using a Roof Inspection Checklist?
Roofing professionals usually recommend two roof inspections yearly using a Roof Inspection Checklist, preferably in the spring and fall.
6. What are the possible consequences of neglecting the use of a Roof Inspection Checklist?
Neglecting to use this checklist could lead to unnoticed damage, expensive future repairs, shorter roof lifespan, or even roof failure during harsh weather conditions.


